1A: Onshape Fundamentals - Section 2
Exercise 4: Motor Mounting Plate
In this exercise, you will be making a simple motor mounting plate. It shouldn't be too difficult, since it is similar to the gussets and plates made in the previous exercises.
To get started, find the "Exercise 4: Motor Mounting" part studio in the "Section 2" folder in your copy of the template document.
Sketch out and extrude the motor mounting plate using the reference image below.
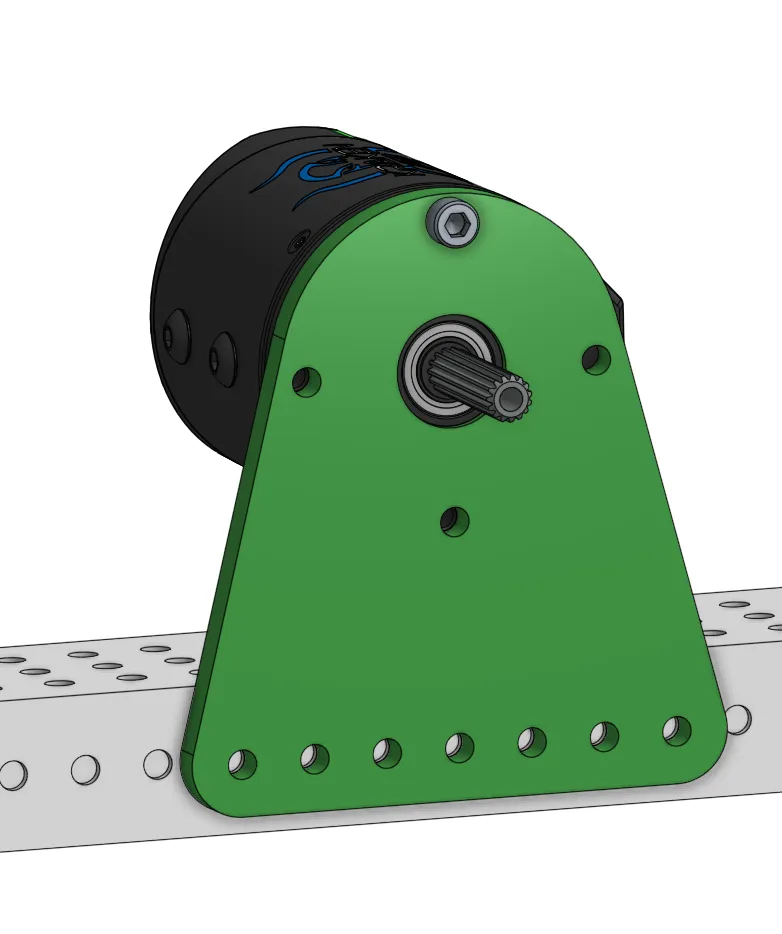
Try to use the Circular Pattern tool to make the holes for the motor in a 2" (inch) diameter circle, with a 20mm diameter circle cut out for the middle of the motor. The size of the holes should be 4mm diameter (the clearance fit for #10-32, the standard imperial bolt size for FRC motors).
Tip
In FRC, you will often have to work with imperial parts and measurements. If you need to dimension something to 2" (2 inches), you can type "2 in" directly into a sketch dimension and Onshape will automatically convert it to millimetres for you.
Complete?
Go back to your exercise 3 part studio and try and add a motor mount to the to somewhere on the superstructure.
Move on to the next exercise in Section 3 when you're done with the motor mounting plate.